- Visulate GKE quickstart
- Kubernetes Deployment
- Before you begin
- Configure an instance
- Wait for instance to reach ready state
- Create a Load Balancer
- Verify the instance
- Create a database user in the database you want to document
- Register your database connection
- Review your database and its data model
- SQL Query Engine Configuration
- Generate a CSV file
- Enable Google Gemini AI
- Clean up
- Kubernetes Deployment
Visulate GKE quickstart
This page shows you how to create a Visulate instance and connect it to an Oracle database on Google Kubernetes Engine (GKE).
Allow around 60 minutes to complete this tutorial.
Kubernetes Deployment
How to create a Visulate instance on Google Cloud Platform (GCP) and connect it to an Oracle database.
Before you begin
- Identify or create a Kubernetes cluster in Google Cloud.
- Install Visulate from the Google Cloud Marketplace Console
Go to Google Cloud Marketplace
Configure an instance
Review the terms of service and click the Purchase Plan button followed by the Configure button.
Complete the deploy screen
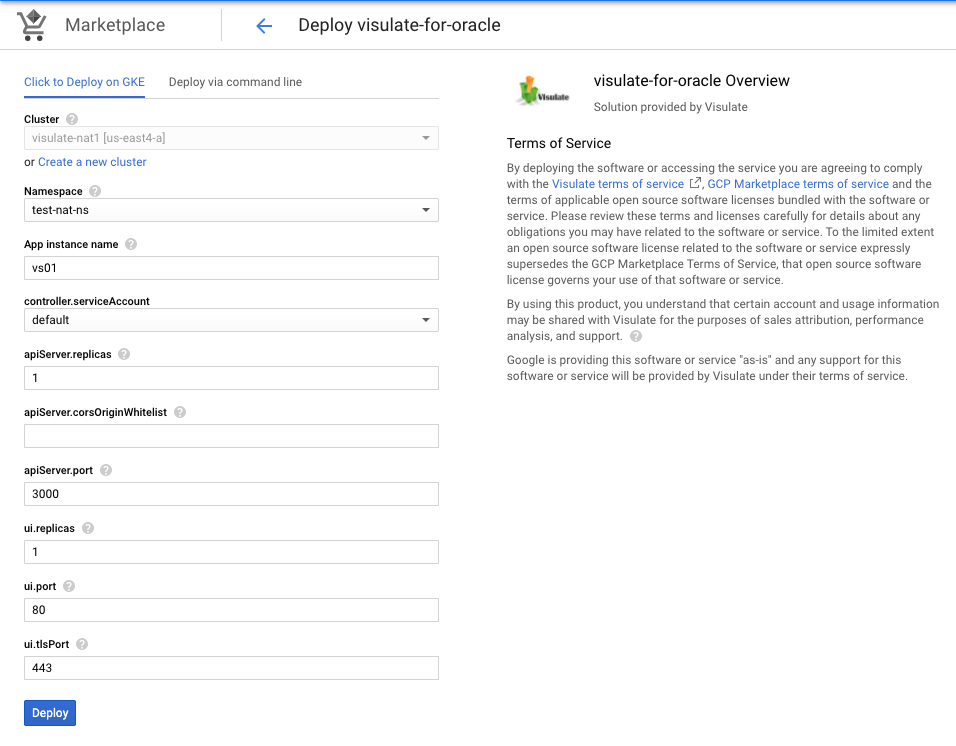
- Select or create a namespace
- Change the default instance name to visulate-01 (see note below)
- Accept the defaults for the remaining fields and press the
Deploybutton
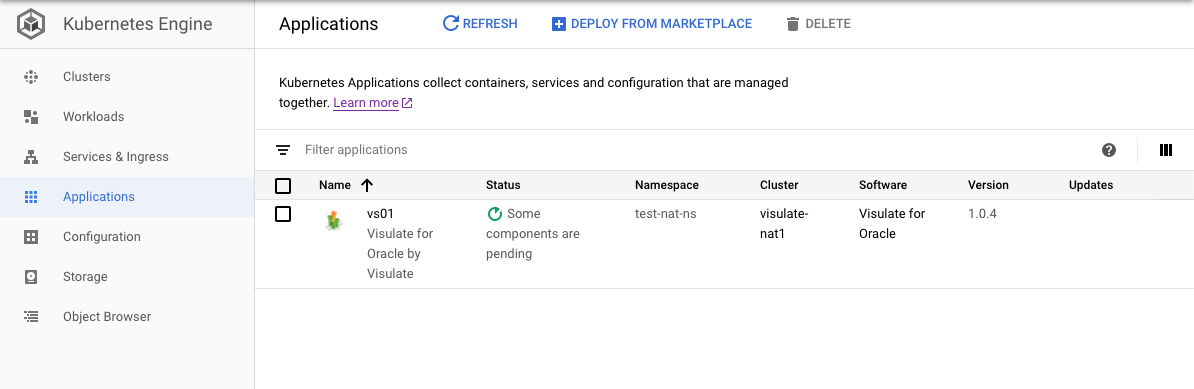
Wait for instance to reach ready state
It may take a few minutes for the instance to deploy
Create a Load Balancer
Visulate creates an Nginx proxy service which exposes a network endpoint group (NEG). Create a load balancer with the NEG as a backend
- Navigate to Google Cloud Load balancing and click the
+ CREATE LOAD BALANCERlink at the top of the screen - Select the following options on the setup screen
- Application Load Balancer (HTTP/HTTPS)
- Public facing (external)
- Global
- Global external Application Load Balancer
- Connect the the load balancer to NEG
Verify the instance
Click on the Load balancer IP address to open the Visulate UI. Rewrite rules should append “/database” to the ip address as shown in the screenshot below.

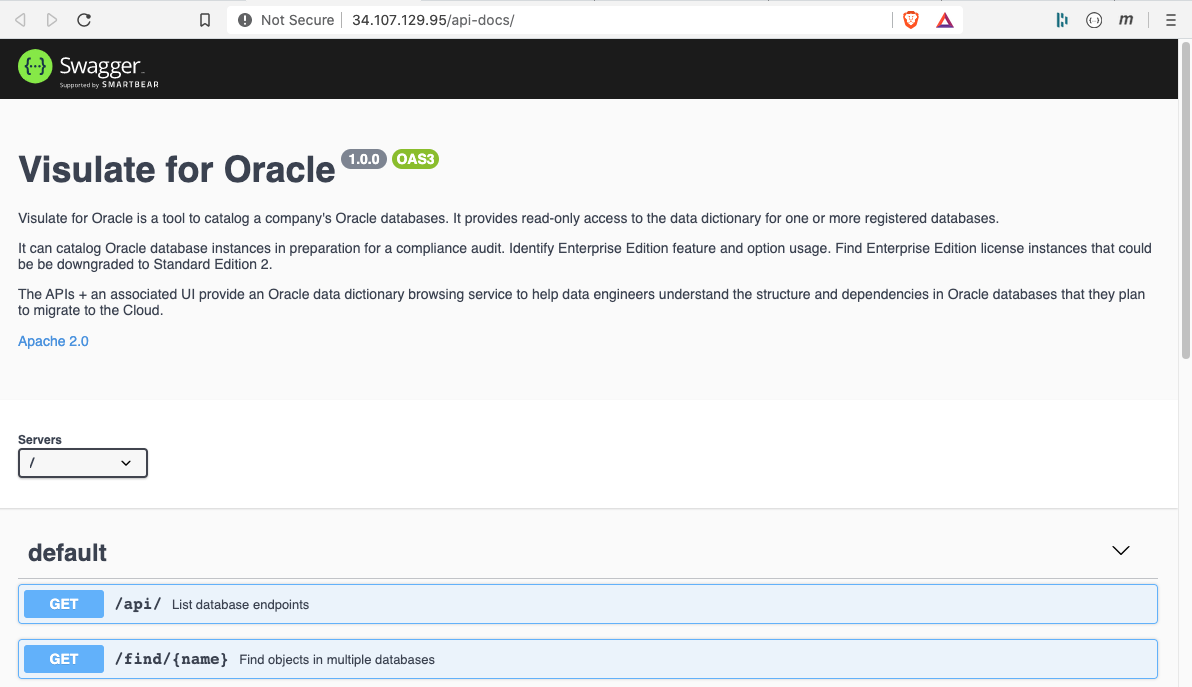
Edit the url changing “/database” to “/api/”. This should make a call to the API server.

Change “/api/” to “/api-docs/” to review the API documentation.
At this point you have a Visulate instance running. Now we need to connect it to an Oracle database.
Create a database user in the database you want to document
Login to SQL*Plus as SYSTEM, create a database user called “VISULATE” and grant CREATE SESSION, SELECT_CATALOG_ROLE and SELECT ANY DICTIONARY privileges to it:
create user visulate identified by &password;
alter user visulate account unlock;
grant create session to visulate;
grant select any dictionary to visulate;
grant select_catalog_role to visulate;
Note: the API server runs a query on startup to verify account privileges. It drops the connection if the account does not have the required grants or if the account has more privileges than it needs. See the database setup guide for additional details.
Register your database connection
A kubernetes secret is used to pass database connection details to the instance. Open a text editor and create a file called db-connections.js. With the following content:
const endpoints = [
{ namespace: 'vis13',
  description: 'Test instance',
  connect: { poolAlias: 'vis13',
            user: 'visulate',
            password: 'jkafDD!@997',
            connectString: 'dev115.visulate.net:1521/vis13',
            poolMin: 4,
            poolMax: 4,
            poolIncrement: 0
          }
}
];
module.exports.endpoints = endpoints;
Edit the password and connectString values to match the ones for your database instance.
Create a Kubernetes secret called oracle-database-connections with database.js as a key the registration file contents as its value:
kubectl create secret generic oracle-database-connections --from-file=database.js=./db-connections.js
Note: the secret’s name is not important but it’s key must be database.js
Open the API deployment screen (from GCP -> Kubernetes Engine -> Workloads) and press the Edit button
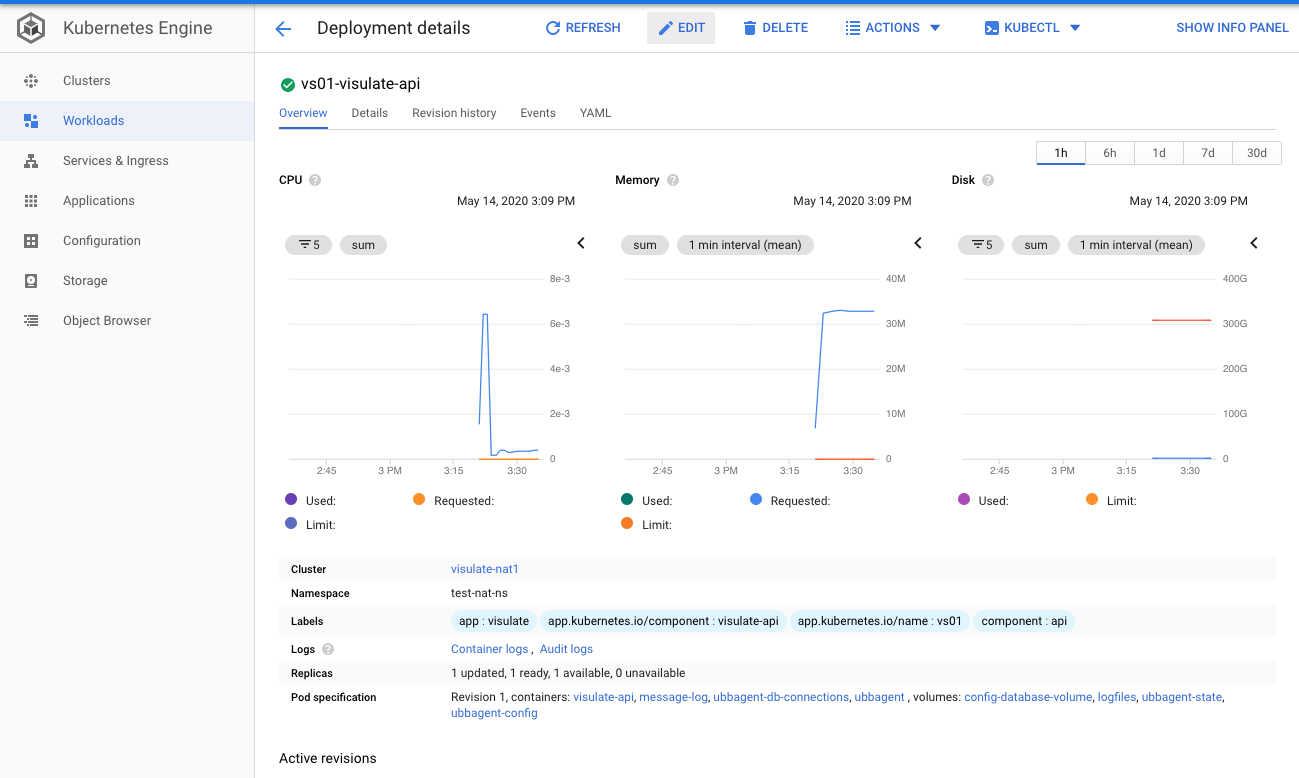
Find the “config-database-volume” entry and change the secretName value to “oracle-database-connections”
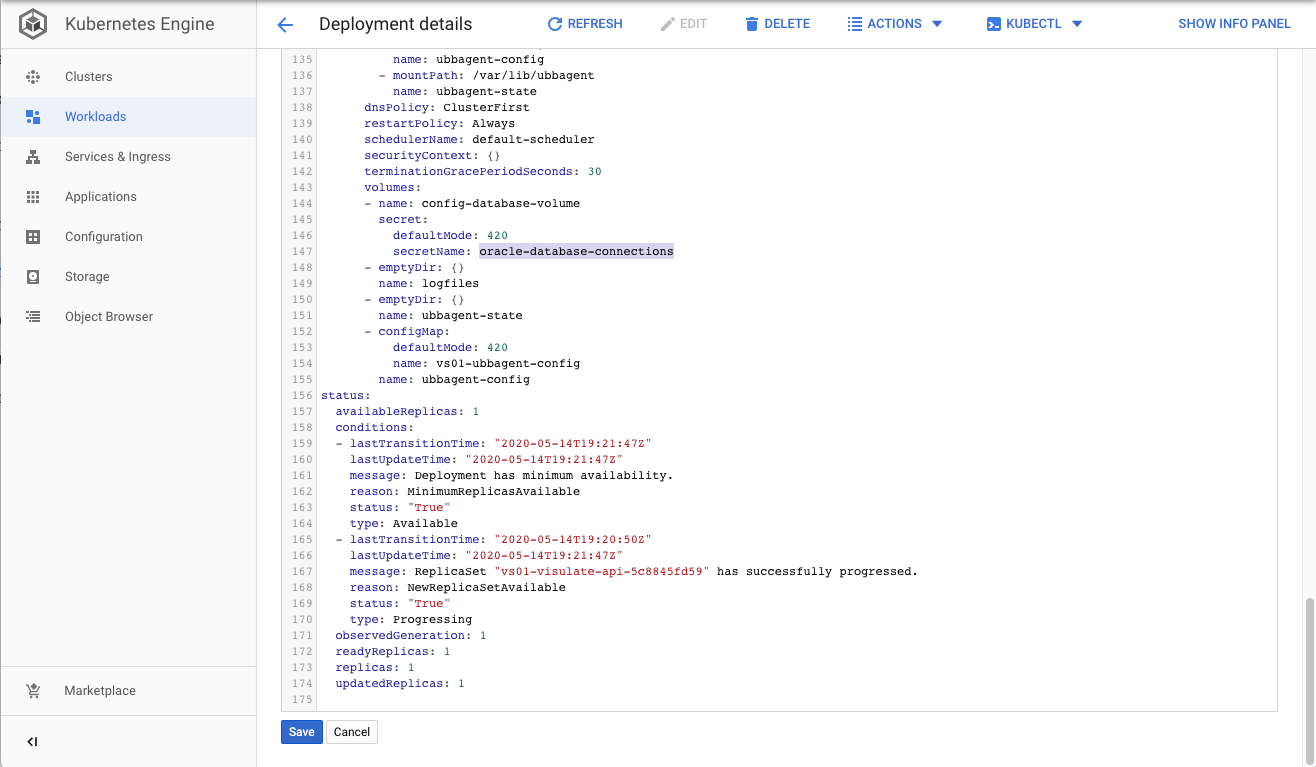
The edited value should look like this:
      volumes:
      - name: config-database-volume
      - secret:
          defaultMode: 420
          secretName: oracle-database-connections
Press the Save button and wait for a new pod to deploy replacing the previous revision.
Note: See the database registration guide for additional details on this step.
Review your database and its data model
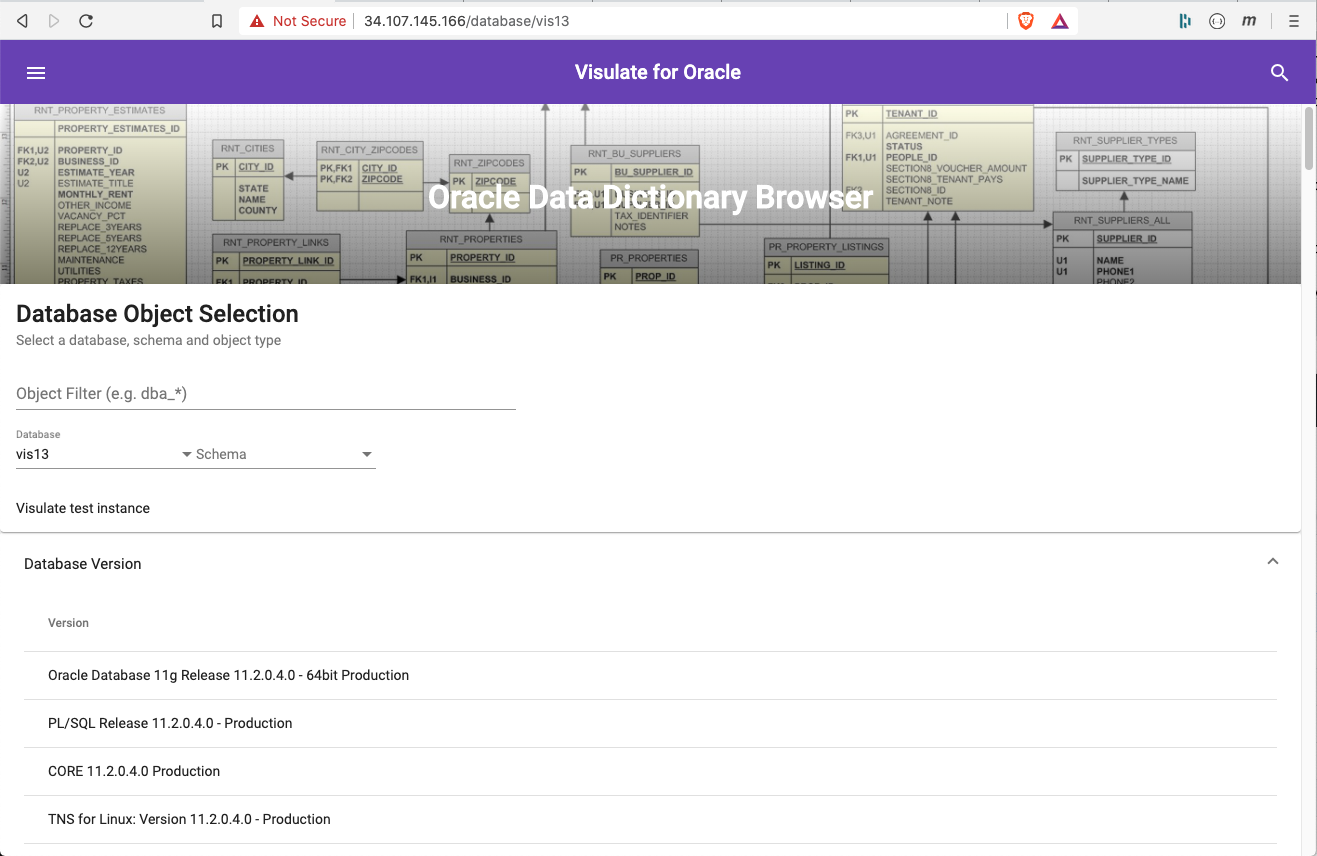
Open the Visulate UI (using the load balancer IP address assigned by the Ingress). Click on the Database dropdown list. You should see an entry called “vis13”. Select the value and wait for the database report to run (may take a couple of seconds). The results will appear below the selection form. Scroll down the page to review.
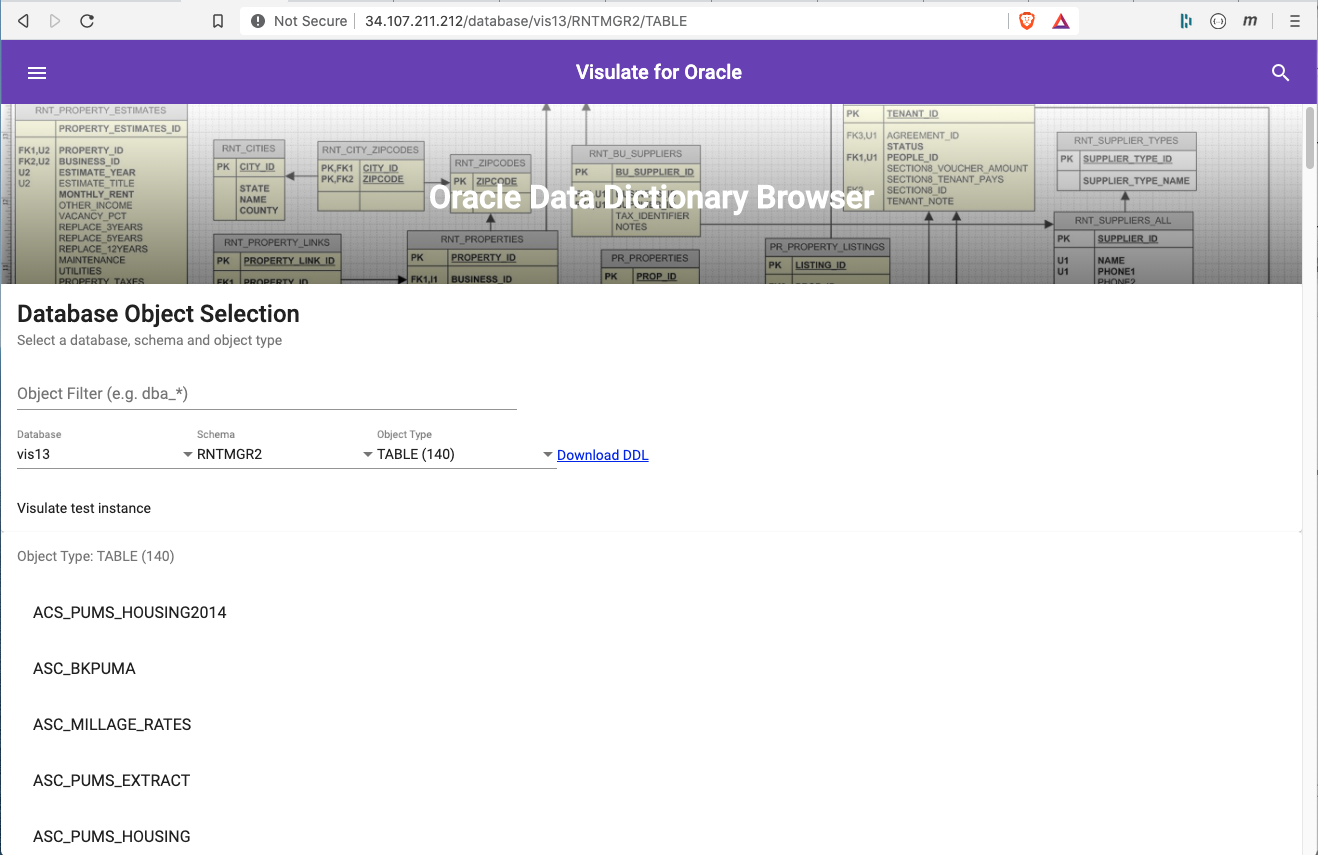
Select a database user from the Schema drop down. Notice the database report is replaced by a schema one. Now select “TABLE” from the Object Type field to see a list of tables in the schema.
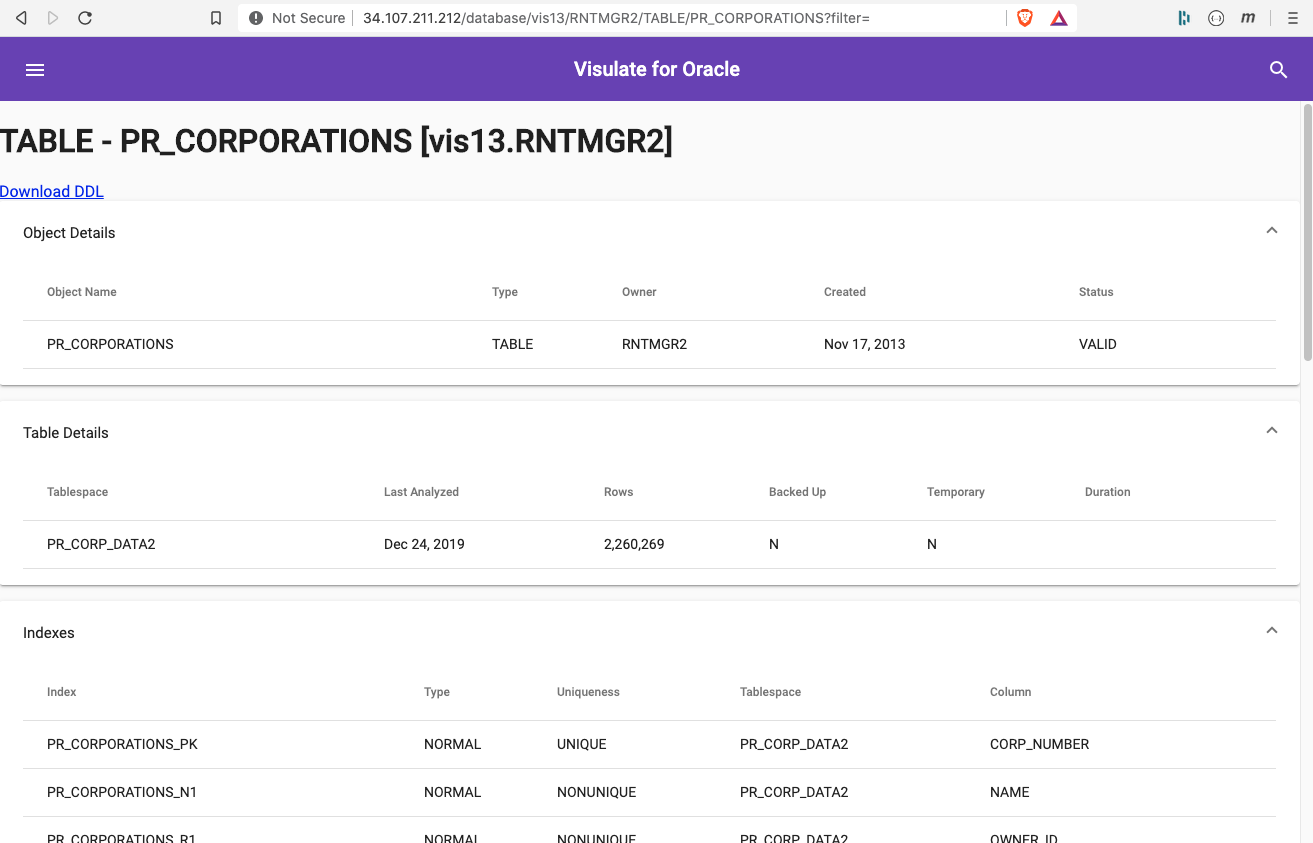
Click on one of the tables to open the table report. This report shows table details like its tablespace, number of rows, indexes, constraints, foreign keys and columns. A Download DDL link at the top of the page can be used to generate the data definition language SQL for the table.
Scroll to the bottom of the page to see a list of objects (e.g. packages, package bodies and views) that reference the table.
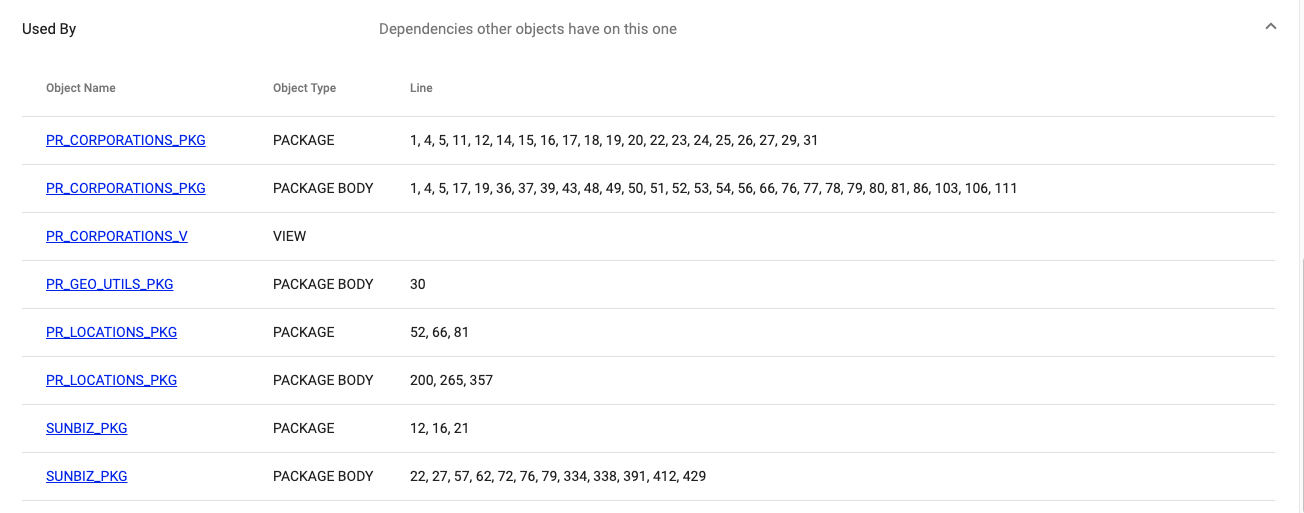
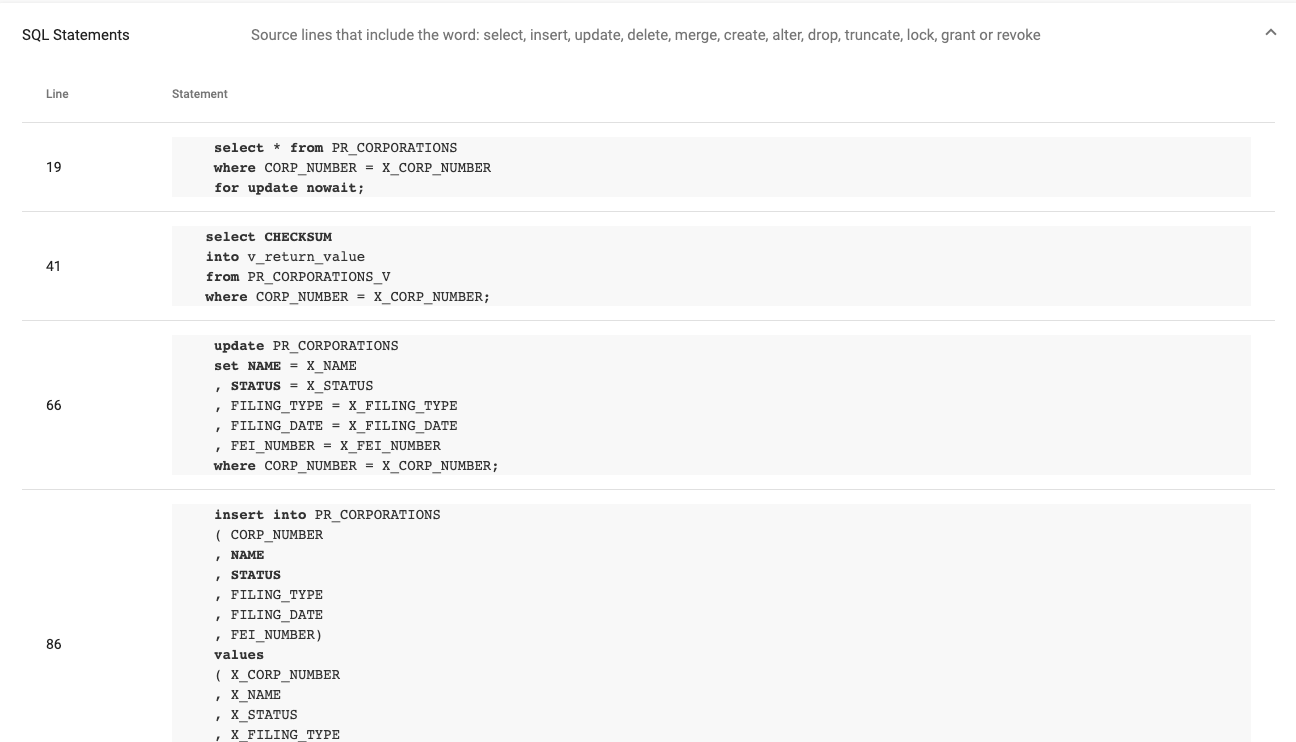
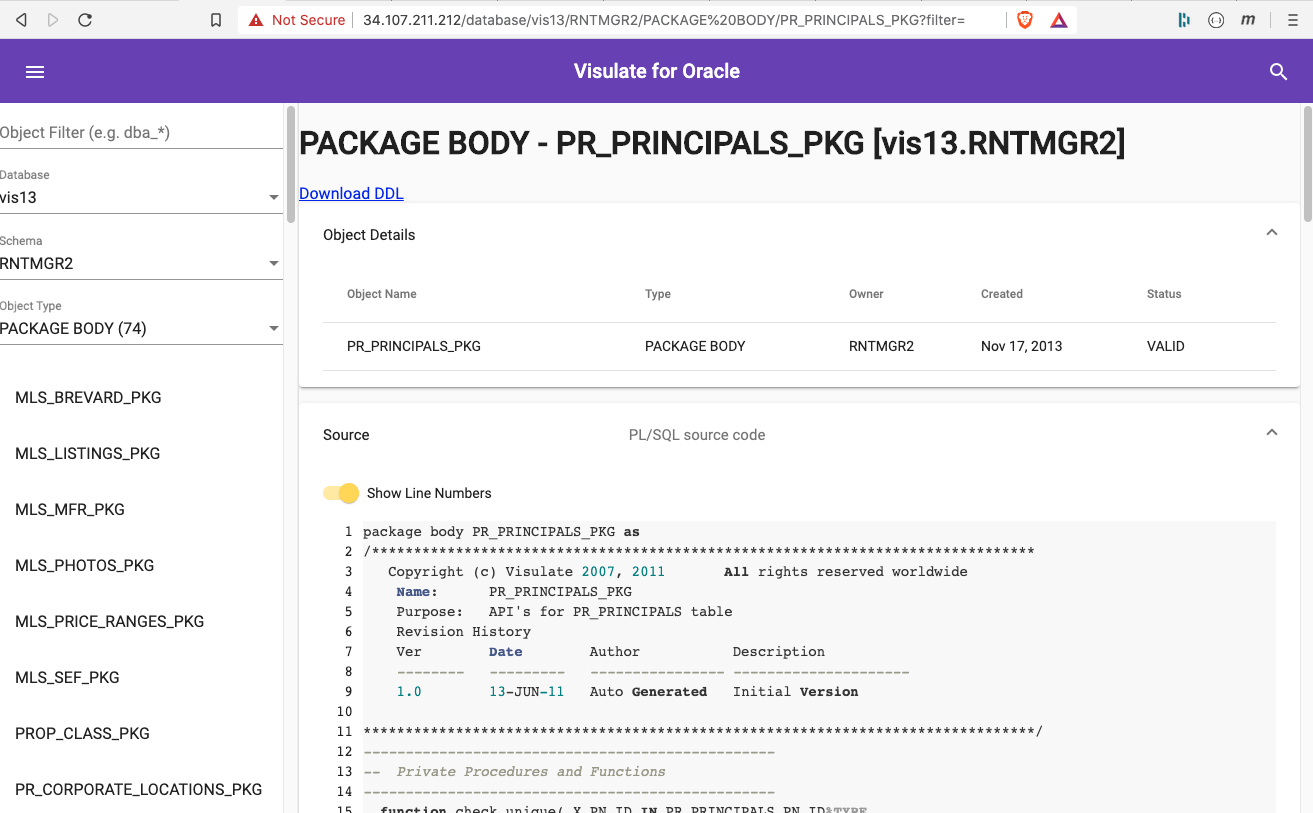
Clicking on an object name in the dependency list will take you to a report showing its definition. For example, selecting a package body will open a report that shows the source code for the package body and a list of the SQL statement it contains.
Open the hamburger menu at the top (left) of the page. This provides a quick way to access other objects of the same type in the schema.
Click on the search icon at the top (right) of the page to access the search form. Enter dba_objects in the search box and press return. This queries every registered database to find objects with a matching object_name (in our case we only have one registered database).
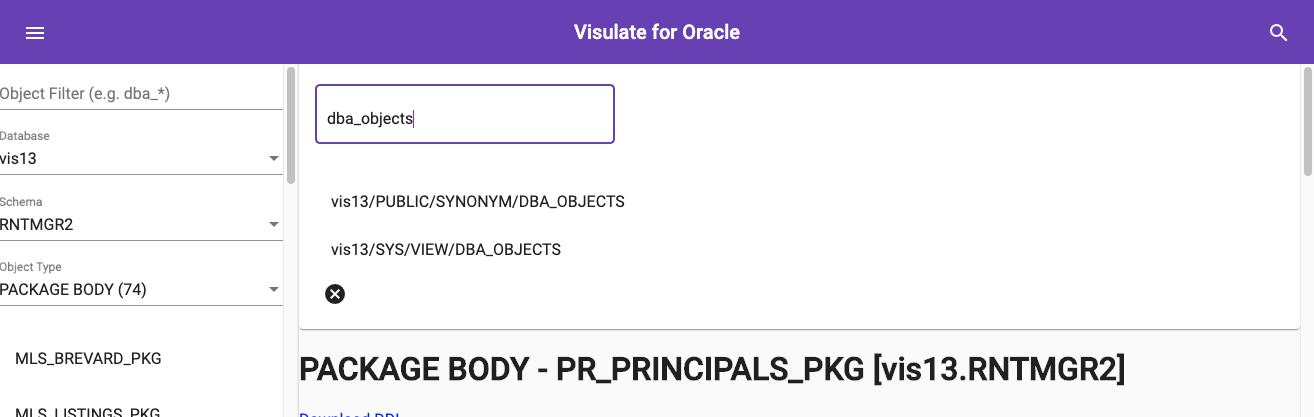
Click on one of the results to see its definition report.
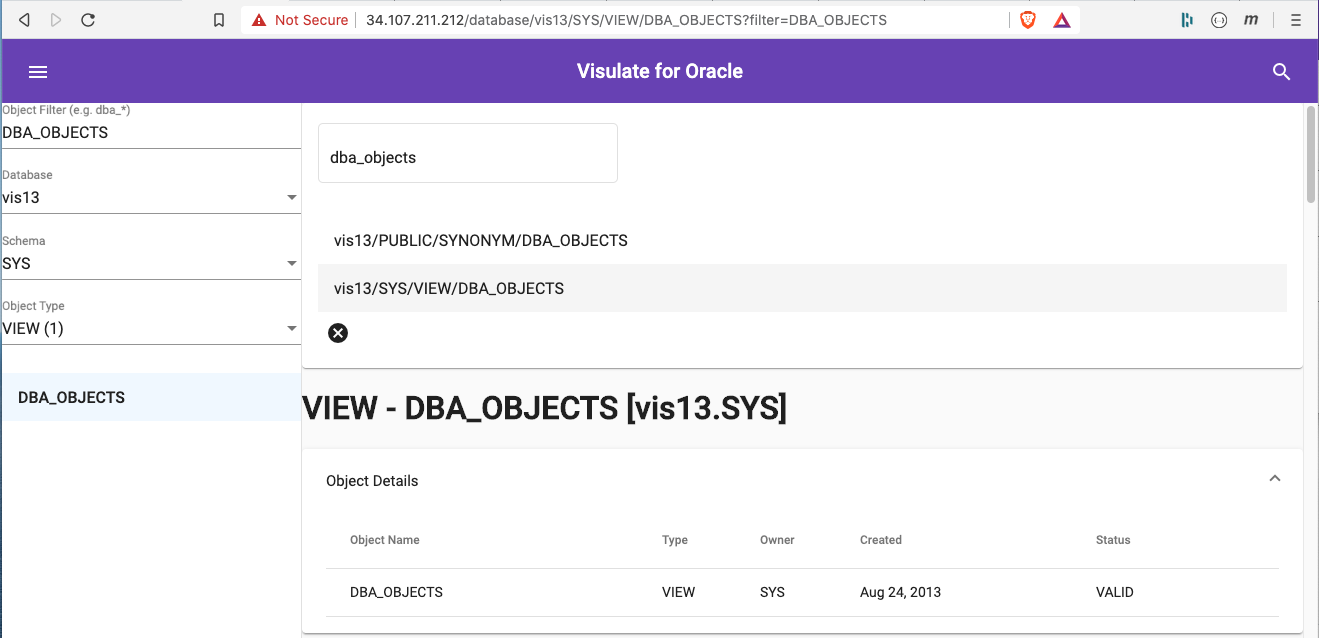
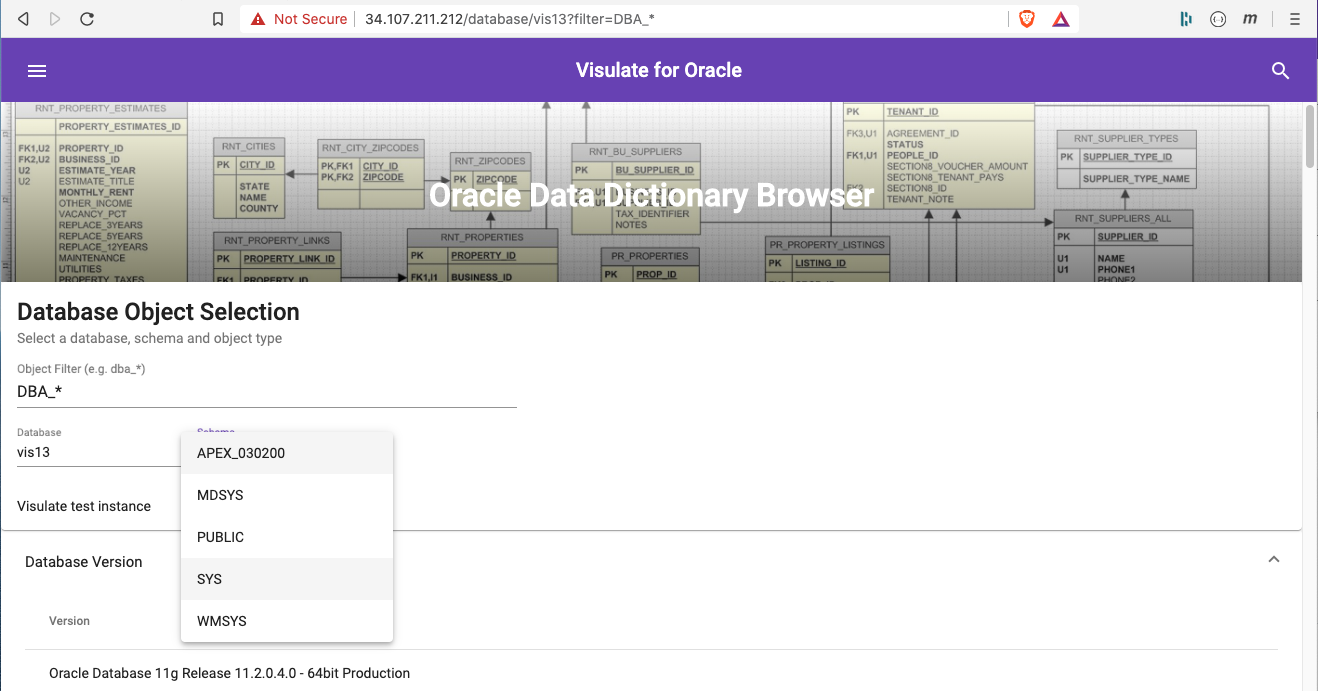
Click on the “Visulate” title at the top (center) of the screen to return to the homepage. Notice the Object Filter field has been populated with DBA_OBJECTS (the last search condition). Change this value to DBA_* and then select a database and schema. Notice the navigation lists are now filtered using this wildcard.
SQL Query Engine Configuration
The SQL Query Engine exposes a REST API to generate CSV files from user supplied SQL. Access to this feature is controlled by a configuration file. This allows a DBA to limit the list of database environments that allow SQL access. For example, they may wish to allow access for development databases but not production.
Use the /endpoints API to generate a configuration file for your database:
curl http://load-balancer-ip/endpoints/ > endpoints.json
Generate a kubernetes secret from the file with a key of endpoints.json:
kubectl create secret generic sql-endpoints --from-file=endpoints.json=./endpoints.json
Edit the config-endpoints-volume entry in the deployment manifest for the SQL query engine deployment (-sql suffix):
      volumes:
      - name: config-endpoints-volume
        secret:
          defaultMode: 420
          secretName: sql-endpoints
Follow the steps outlined in the database registration process above or review the Query engine configuration guide for detailed instructions.
Generate a CSV file
Open the Visulate UI and navigate to a database table. A query editor region is included at the top of the page. It contains an HTML form with username, password, sql query, bind variables and query option fields. Most of the fields are populated with default values.
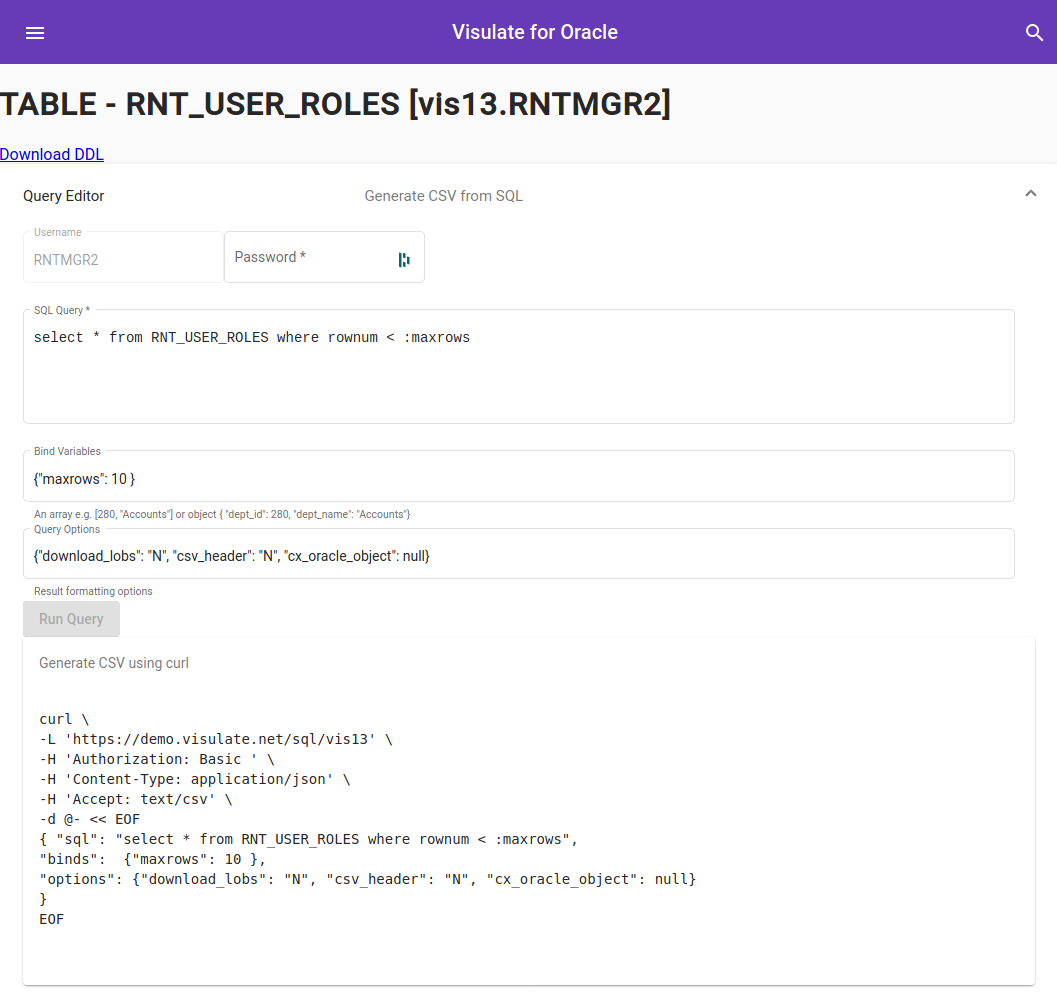
Enter the database password for the schema where the table resides to enable the Run Query button. Note: database credentials are passed to the SQL Query Engine using a basic auth header. Make sure you are using a secure (https) connection before submitting the query (you may need to accept some browser warnings). Run the query and review the results.
A curl command appears below the results. Cut and paste this into a console window to execute the REST API call outside of the UI. Note you may need to pass -k or --insecure option if you haven’t setup a TLS certificate
Enable Google Gemini AI
-
Register an API key in Google AI Studio
-
Open the API deployment screen (from GCP -> Kubernetes Engine -> Workloads) and enter a value for the
GOOGLE_AI_KEYas shown below:spec: containers: - env: - name: CORS_ORIGIN_WHITELIST - name: GOOGLE_AI_KEY value: <add-api-key-value-here> image: gcr.io/visulate-for-oracle/visulate-for-oracle:20.1.3 imagePullPolicy: IfNotPresent livenessProbe: failureThreshold: 3 httpGet: path: /endpoints/ port: 3000 scheme: HTTP initialDelaySeconds: 180 periodSeconds: 60 successThreshold: 1 timeoutSeconds: 20 name: visulate-for-oracle-api -
Save your changes and wait for the deployment to redeploy.
-
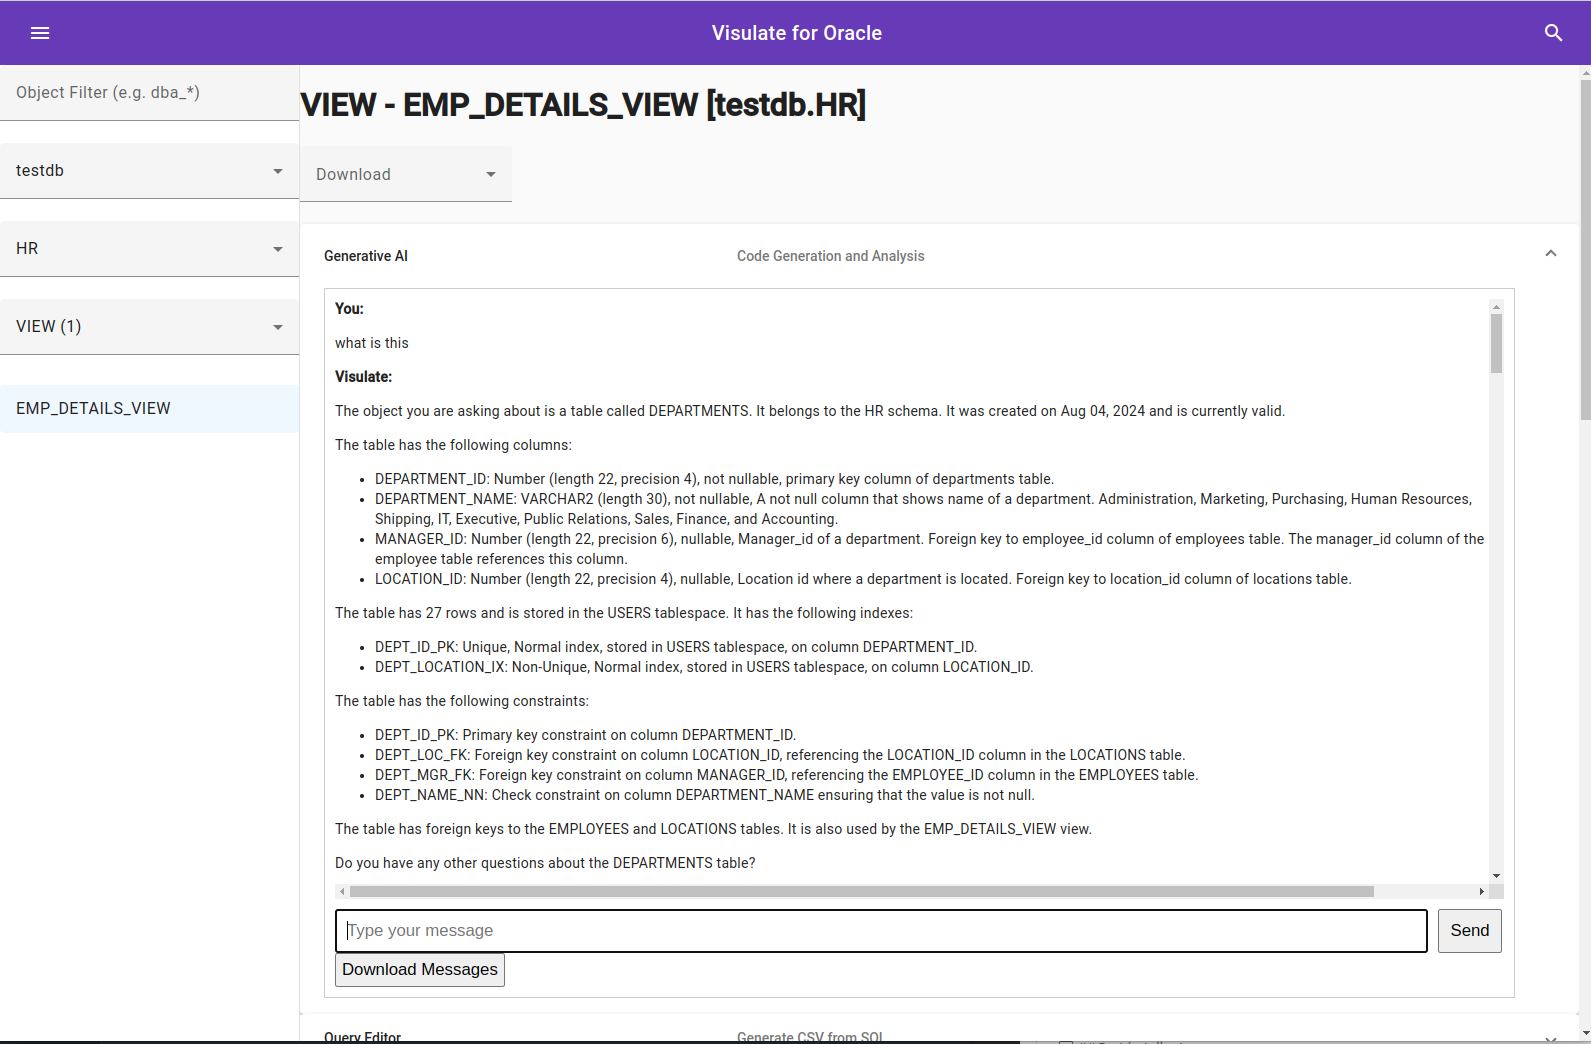
Navigate to a database table screen and start asking questions
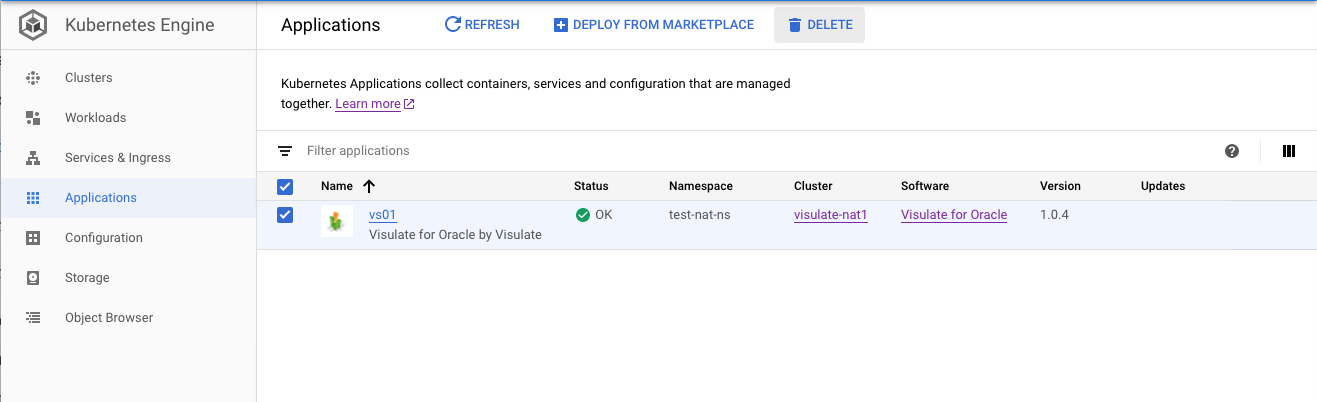
Clean up
- Use the Kubernetes Engine -> Applications screen to delete the instance. Select the check box next to the application name then press the
Deletebutton at the top of the screen
- Delete the GKE Cluster if it is no longer required.
- Drop the visulate user from the database. Login to SQL*Plus as SYSTEM and run
drop user visulate cascade; - Verify the Load balancer that was created to support the Ingress resource has been removed (see the troubleshooting guide for details).
Copyright © Visulate LLC, 2019, 2025 Privacy Policy